How I made light trails photo effect of a Porsche Macan S
15/09/2020
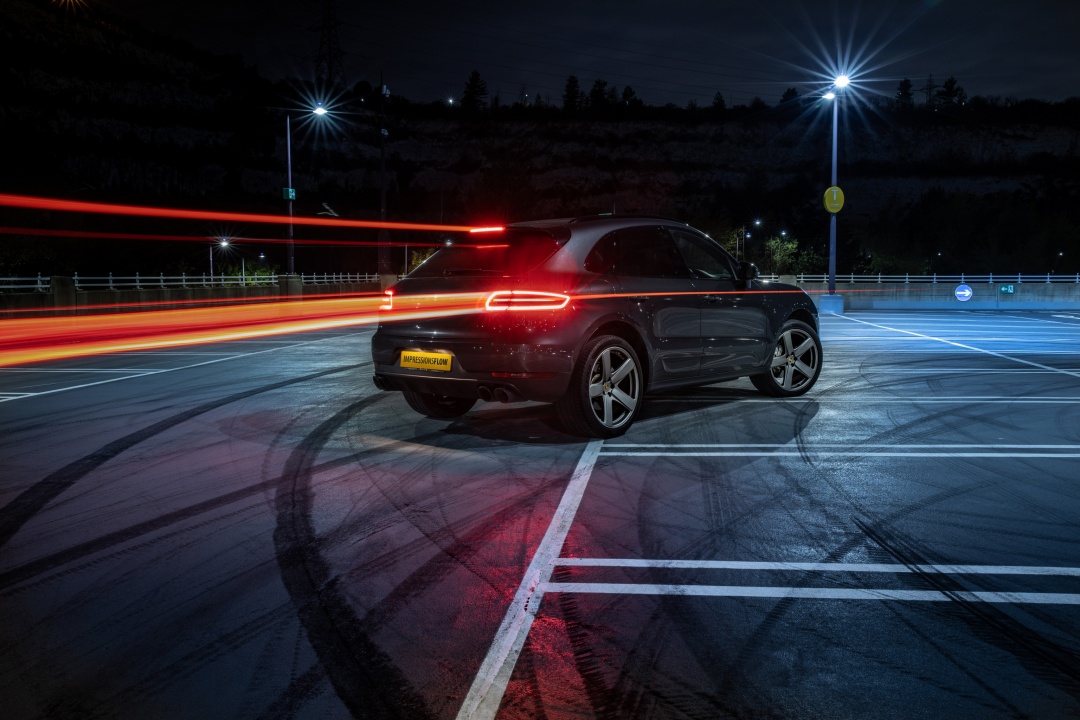
If I had to pick my favourite shot – it would be a long exposure stacked shot of the stop light trails of the Porsche Macan S.
This is my latest automotive photography practice photoshoot. And I’m to write less about car but more about the light trails photo effect technique this time.
How I made light trails photo effect
After I’ve posted the cover picture of this post I’ve received some questions about how did I do the light trails effect. So here I am to explain the process step by step.
- Setup camera for long exposure shot (in Manual mode). I.e. you may use aperture of F22 and 30s shutter speed with ISO100. Idea here is that if you don’t have someone to release the shutter for you, just use the remote. It was bluetooth remote in my case. I was able to trigger it from inside of the car. Camera of course to be placed on a tripod and make sure it is not wobbly because of the wind or other factors.
- Perform the driving and shooting of three shots:
- You are outside of the frame and trigger the long exposure shot. Drive into the centre of the frame braking to the full stop. Nice trails of the stop lights gets captured.
- While at full stop, trigger the shot once again and remain stand still with brakes pressed. Still picture of a car get captured. Why we need this one? Well, because the car would be transparent like a ghost in the first one as it didn’t spend all the exposure time in that place.
- Start exposure again and drive off. That is the shot where I took that right single trail of a red running light.
- Editing part consists of taking all three pictures as layers onto the same file and taking stand still picture as a base, then masking the other two so that we take only light trails from them.
The result that came out after the process I’ve described above is the photo that is on the header of this post (also the first in the gallery).